
Protein Cookies: The Best Recipes for a Healthy Snack
Table of Contents
Introduction: Can Your Cookie Jar Actually Fuel Your Fitness Goals?
Did you know that online searches for “healthy protein snacks” have skyrocketed by over 45% in the past two years alone, according to recent search trend data? This surge dramatically challenges the long-held belief that delicious treats and fitness goals are mutually exclusive.
What if satisfying your sweet cravings didn’t mean derailing your progress, but could actually support it? Imagine biting into a soft, chewy cookie, bursting with flavour, knowing it’s packed with muscle-supporting protein. Forget guilt-laden indulgences! Today, we’re diving deep into the world of Protein Cookies. We’ll unveil not just a recipe, but the foundational secrets to creating the best Protein Cookies – delicious, satisfying, and genuinely beneficial additions to your healthy lifestyle. Get ready to transform your snack game!
Ingredients List: The Powerhouse Components for Your Perfect Protein Cookies
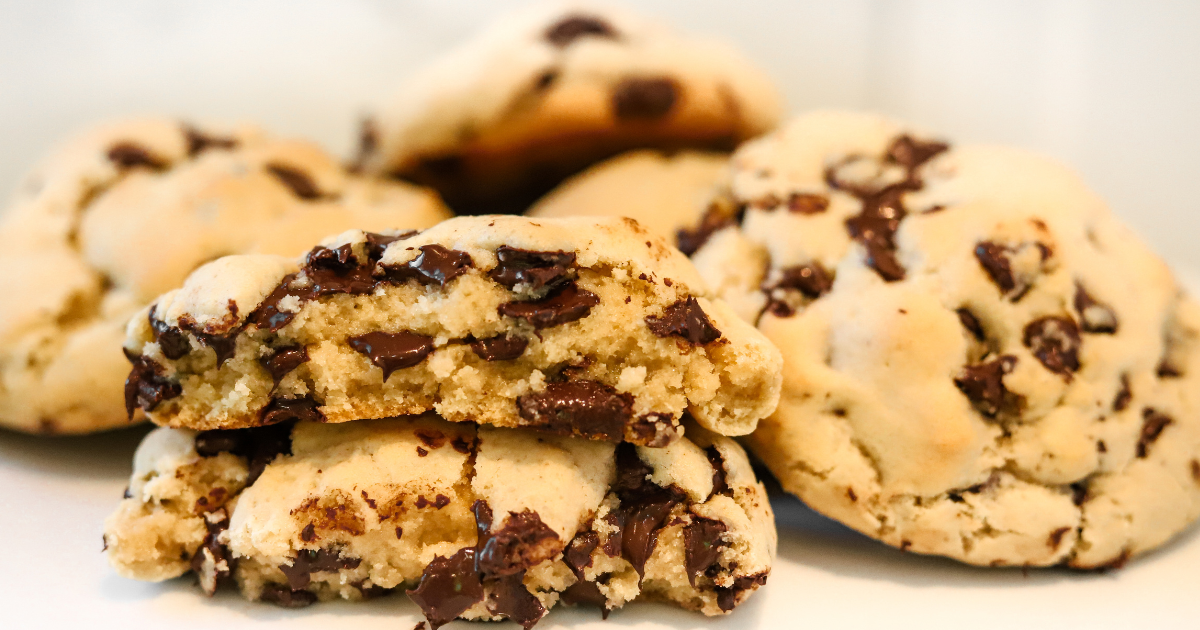
Crafting the ultimate Protein Cookies requires a blend of functional and flavourful ingredients. We’re aiming for that perfect balance of taste, texture, and, of course, protein punch! Here’s your arsenal for our signature Soft & Chewy Chocolate Chip Protein Cookies:
- Rolled Oats or Oat Flour (1.5 cups / 140g): The heart of our cookie! Rolled oats provide a lovely chewy texture, while oat flour (easily made by blending rolled oats) yields a slightly smoother cookie. Feel free to use either, or a mix! Substitution: Almond flour can work for a grain-free option, but may require slight adjustments to wet ingredients as it absorbs moisture differently. Coconut flour is highly absorbent and usually requires significant recipe changes – use with caution.
- Protein Powder (1 cup / approx. 100-120g, depending on type): The star player! A vanilla or unflavoured whey/casein blend often works best for texture in baking. We’ll use this as our base example. Crucial Substitutions: Plant-based blends (pea, soy, rice) work well too! Ensure it’s a protein powder you enjoy the taste of. Note: Pure whey isolate can sometimes bake drier. See our FAQs for more on choosing powders.
- Creamy Nut Butter (1/2 cup / 128g): Adds healthy fats, binding, moisture, and flavour. Almond butter or peanut butter are classics. Ensure it’s creamy and preferably natural (just nuts and salt). Substitution: Cashew butter, sunflower seed butter (for nut-free), or tahini can be used, each imparting a distinct flavour note.
- Natural Sweetener (1/3 cup / 80ml): We’re using pure maple syrup for its lovely flavour and moisture. Substitution: Honey works beautifully too. Liquid stevia or monk fruit sweetener can significantly reduce sugar, but you may need to add a tablespoon or two of extra liquid (like unsweetened applesauce or milk) to compensate for the lost moisture.
- Large Egg (1): Acts as a binder and adds richness. Use room temperature for better integration. Vegan Substitution: A flax egg (1 tbsp ground flaxseed + 3 tbsp water, let sit 5 mins) or 1/4 cup unsweetened applesauce works well.
- Pure Vanilla Extract (1 teaspoon): Elevates all the other flavours. Non-negotiable for that classic cookie taste!
- Baking Soda (1/2 teaspoon): Provides lift, reacting with any acidic components.
- Salt (1/4 teaspoon): Balances sweetness and enhances flavour perception.
- Chocolate Chips (1/2 cup / 90g): The jewels of our cookie! Dark chocolate chips (70% cocoa or higher) offer antioxidant benefits and intense flavour. Substitution: Sugar-free chocolate chips, chopped nuts (walnuts, pecans), seeds (pumpkin, sunflower), or unsweetened shredded coconut are great additions or swaps.
Timing: Your Fast Track to Protein-Packed Goodness
One of the beauties of making Protein Cookies is their efficiency. Forget long chilling times often required for traditional recipes!
- Preparation Time: 10-15 minutes (Gathering ingredients, mixing)
- Cooking Time: 10-12 minutes per batch
- Total Time: Approximately 25-30 minutes (plus essential cooling time)
Data Insight: This rapid turnaround makes these Protein Cookies incredibly practical. Compared to standard gourmet cookie recipes which often average 45-60 minutes of prep and baking (excluding chilling), this recipe is potentially 30-50% faster, delivering a nutritious snack without demanding hours in the kitchen. Perfect for busy schedules and immediate post-workout cravings!
Step-by-Step Instructions: Baking Your Batch of Power Cookies
Ready to create some magic? Follow these simple, personalized steps to bake the most delicious Protein Cookies you’ve ever tasted.
Step 1: Preheat & Prepare Your Baking Station
First things first, let’s get that oven roaring! Preheat it to 350°F (175°C). Line a large baking sheet (or two) with parchment paper or a silicone baking mat – this prevents sticking and ensures easy cleanup, a gift your future self will appreciate! Actionable Tip: Getting your oven fully preheated ensures your cookies bake evenly from the moment they go in.
Step 2: Combine the Dry Ingredients – The Flavor Foundation
In a medium-sized mixing bowl, let’s build our flavour base. Whisk together the oat flour (or rolled oats), your chosen protein powder, baking soda, and salt. Personalized Touch: Really get in there and whisk thoroughly! This ensures the leavening agent (baking soda) is evenly distributed, preventing any pockets of bitterness and guaranteeing a consistent rise and texture in every single cookie. Imagine setting the stage for perfection!
Step 3: Mix the Wet Ingredients – The Moisture Core
In a separate, larger mixing bowl, combine the creamy nut butter, maple syrup (or your chosen liquid sweetener), the room-temperature egg (or flax egg/applesauce), and the pure vanilla extract. Whisk these together until the mixture is smooth and well combined. Pro Tip: If your nut butter is quite thick or cold, warming it slightly (just a few seconds in the microwave) can make it much easier to mix smoothly.
Step 4: Marry the Wet and Dry – Bringing It All Together
Now, pour the dry ingredient mixture into the bowl with the wet ingredients. Using a sturdy spatula or wooden spoon, mix until just combined. Be careful not to overmix! Crucial Insight for Protein Cookies: Protein powder, especially whey, can make dough tough if overworked. Mix only until you no longer see streaks of dry ingredients. The dough will likely be thicker than traditional cookie dough – this is normal and expected!
Step 5: Fold in the Goodies – Chocolate Chip Time!
Gently fold in your chocolate chips (or other chosen mix-ins like nuts or seeds). Distribute them evenly throughout the thick dough so every bite promises a delightful burst of flavour or texture. Sensory Note: This is where your Protein Cookies truly come alive with personality!
Step 6: Scoop Your Way to Happiness – Portioning Perfection
Using a medium cookie scoop (about 1.5 to 2 tablespoons) or two spoons, drop rounded mounds of dough onto your prepared baking sheet(s). Leave about 2 inches between cookies. Baker’s Tip: Protein cookie dough doesn’t spread as much as traditional dough. Gently press down on the tops of the dough mounds with your fingers or the bottom of a glass (dipped lightly in water or oil to prevent sticking) to flatten them slightly into a more classic cookie shape. This helps ensure even baking.
Step 7: Bake to Golden Goodness
Place the baking sheet into your fully preheated oven. Bake for 10-12 minutes. Look for the edges to be set and lightly golden brown. The centers should still look slightly soft – they will continue to firm up as they cool. Key for Protein Cookies: Avoid overbaking! Protein baked goods tend to dry out more quickly than their traditional counterparts. Err on the side of slightly under-baked for the best chewy texture.
Step 8: The Essential Cool Down – Patience Pays Off!
Once baked, let the Protein Cookies cool on the baking sheet for 5 minutes. This allows them to set properly. Then, carefully transfer them using a spatula to a wire rack to cool completely. Why Wait? While tempting, allowing them to cool fully develops their flavour and final texture. They’ll firm up perfectly, achieving that satisfying chew.
Nutritional Information: Understanding Your Healthy Treat
These Protein Cookies are designed to be a healthier alternative, but understanding their nutritional profile helps you fit them into your eating plan. Here’s an approximate breakdown per cookie (assuming the batch makes ~15 cookies):
- Calories: 150 – 200 kcal (depends heavily on protein powder, nut butter, and mix-ins)
- Protein: 8 – 12g (Excellent source! Varies greatly by protein powder type and scoop size)
- Fat: 8 – 12g (Primarily healthy fats from nut butter)
- Saturated Fat: 2 – 4g
- Carbohydrates: 15 – 20g
- Fiber: 2 – 4g (Good source from oats and nut butter)
- Sugars: 8 – 12g (Mainly from natural sweetener and chocolate chips; significantly less than many traditional cookies)
- Key Micronutrients: Depending on ingredients, can contribute iron, magnesium, and B vitamins.
Data Insight: The substantial protein content (often 2-3 times that of a standard chocolate chip cookie) is key. Studies published in journals like Obesity Reviews consistently link higher protein intake with increased satiety and appetite control, potentially making these Protein Cookies a more satisfying snack choice that helps manage hunger between meals compared to carb-heavy options.
Healthier Alternatives for the Recipe: Customizing Your Cookies
Want to tweak these Protein Cookies further to meet specific goals or preferences? Let’s get creative:
- Lower Sugar:
- Replace maple syrup/honey with a sugar-free liquid sweetener (like monk fruit syrup) and add 1-2 tbsp unsweetened applesauce or mashed banana for moisture.
- Use sugar-free chocolate chips.
- Data Point: Swapping maple syrup for a zero-calorie liquid sweetener can slash sugar content by over 90% per cookie.
- Lower Fat:
- Use powdered peanut butter (like PBfit) reconstituted with water instead of regular nut butter (note: texture will be less rich).
- Reduce chocolate chips or swap for lower-fat additions like dried cranberries (watch sugar content).
- Higher Fiber:
- Add 1-2 tablespoons of chia seeds or ground flaxseed to the dry ingredients (you might need a tiny splash more liquid).
- Use whole rolled oats instead of oat flour for more texture and fibre.
- Nut-Free:
- Use sunflower seed butter or tahini instead of nut butter.
- Ensure chocolate chips are nut-free and skip any added nuts.
- Flavour Enhancements:
- Add spices like cinnamon (1 tsp) or nutmeg (1/4 tsp) to the dry ingredients.
- Incorporate orange or lemon zest for brightness.
- Use different extracts like almond or peppermint (use sparingly!).
- Boost Performance Ingredients:
- Consider adding a tablespoon of maca powder or creatine powder (unflavoured) to the dry mix if it aligns with your supplement strategy (note: taste/texture may be slightly affected).
Serving Suggestions: Enjoying Your Protein Powerhouse
These versatile Protein Cookies can be enjoyed in so many ways beyond just grabbing one from the jar:
- Post-Workout Reward: The ideal scenario! Consume 1-2 cookies within 30-60 minutes after exercise to help replenish glycogen stores and provide protein for muscle repair. Personalized Tip: Pair with a glass of milk (dairy or plant-based) for extra protein and hydration.
- Mid-Afternoon Pick-Me-Up: Combat the 3 PM slump with a satisfying snack that provides sustained energy, unlike sugary alternatives that lead to crashes.
- Healthy Dessert: Crumble a cookie over Greek yogurt or a smoothie bowl for added texture and a protein boost. Imagine warm, crumbled Protein Cookies over low-sugar vanilla frozen yogurt!
- On-the-Go Fuel: Pack a couple in your gym bag, work bag, or lunchbox for a convenient and nutritious snack anytime, anywhere.
- Coffee Companion: Elevate your morning coffee or tea break with a cookie that actually offers nutritional benefits.
- Creative Crumble: Use slightly stale cookies (if they last that long!) crushed as a topping for baked apples or pears.
- Visual Appeal: Data consistently shows that aesthetically pleasing food is perceived as tastier. Serve them stacked invitingly on a plate, perhaps with a small dusting of cocoa powder or alongside fresh berries.
Common Mistakes to Avoid: Ensuring Protein Cookie Perfection
Baking with protein powder presents unique challenges. Avoid these common pitfalls for guaranteed success:
- Using the Wrong Type of Protein Powder: Different proteins (whey isolate, whey concentrate, casein, soy, pea) absorb liquid and bake differently. Using a powder not suited for baking can lead to dry, rubbery, or strangely textured cookies. Solution: Start with a blend (whey/casein) or a plant-based blend designed for smoother texture. If using pure isolate, you might need slightly more liquid or fat. Follow recipe recommendations closely.
- Overbaking: This is the #1 enemy of moist Protein Cookies! Protein structures set quickly and can become very dry when overexposed to heat. Solution: Bake just until the edges are set and lightly golden. The center should look slightly underdone. They firm up significantly upon cooling. Trust the process!
- Overmixing the Dough: Even without excessive gluten, overmixing protein dough can lead to tough cookies. Solution: Mix wet and dry ingredients only until combined. Fold in additions gently.
- Expecting Exact Traditional Cookie Texture: Protein changes things! While delicious, these cookies might be slightly denser or cakier than their butter-and-sugar-laden cousins. Solution: Manage expectations! Appreciate them for the delicious, functional treats they are. Adjusting ingredients (like adding a bit more fat or using specific binders) can help mimic traditional textures.
- Inconsistent Scooping/Flattening: Leads to uneven baking – some cookies burnt, others raw. Solution: Use a cookie scoop for uniform size. Flatten mounds consistently for even heat penetration.
- Not Cooling Properly: Hot protein cookies can be crumbly and less flavourful. Solution: Allow the 5-minute cool on the pan, then transfer to a wire rack to cool completely for optimal texture and taste development. Experiential Advice: The difference in texture between a warm and fully cooled protein cookie can be surprisingly significant.
Storing Tips for the Recipe: Maintaining Freshness and Flavor
Proper storage keeps your Protein Cookies tasting great and maintains their texture:
- Room Temperature: Once completely cool, store cookies in an airtight container at room temperature. They are best enjoyed within 3-4 days. Tip: Adding a slice of bread to the container can sometimes help maintain softness, though this works better for traditional cookies.
- Refrigeration: For longer storage (up to a week), keep them in an airtight container in the refrigerator. Note: Refrigeration can sometimes make protein cookies slightly firmer or drier. Let them sit at room temp for 10-15 minutes before eating for better texture.
- Freezing (Best for Long Term): This is the ideal method for preserving freshness for weeks or months.
- Method 1 (Individual): Place cooled cookies in a single layer on a baking sheet and freeze until solid (about 1 hour). Then, transfer the frozen cookies to a zip-top freezer bag or airtight container, removing as much air as possible. Freeze for up to 3 months.
- Method 2 (Stacked): Layer cookies in an airtight container with sheets of parchment paper between layers to prevent sticking. Freeze for up to 3 months.
- Thawing: Thaw frozen cookies at room temperature for 15-30 minutes or gently warm in the microwave for a few seconds.
- Prep Ahead: You can often mix the dough (without baking soda if making well ahead) and store it tightly covered in the fridge for 1-2 days before scooping and baking. You may need to let it soften slightly at room temp before scooping.
Conclusion: Your Go-To Guide for Guilt-Free Indulgence
You’ve now unlocked the secrets to baking incredible Protein Cookies! From understanding the powerhouse ingredients and navigating the simple steps to mastering storage and avoiding common pitfalls, you’re fully equipped to create healthy snacks that are both genuinely delicious and aligned with your fitness goals. These cookies prove that satisfying your sweet tooth doesn’t have to mean compromising your progress. They are the perfect blend of flavour, function, and convenience.
This recipe serves as your perfect foundation. Remember the flexibility – experiment with different protein powders, mix-ins, and healthy swaps to create your signature Protein Cookies. Embrace the joy of baking something that nourishes your body and delights your taste buds!
Ready to power up your snack time? Bake a batch of these incredible Protein Cookies today! Share your results, photos, and any creative variations in the comments below – we can’t wait to see what you create! Looking for more healthy fuel? Check out our recipes for [Link to Protein Ball Recipe] or explore our guide to [Link to Choosing the Best Protein Powder]. Happy Baking!
FAQs: Your Protein Cookie Questions Answered
- Q1: Can I use any protein powder for these cookies? A1: While many work, results vary. Whey/casein blends or plant-based blends often yield better texture than pure whey isolate (which can be drying) or pure casein (which can be thick). Always choose a flavour you enjoy, as it will come through in the cookie. Unflavoured or vanilla work well as a base.
- Q2: Why are my protein cookies dry or crumbly? A2: This is usually due to overbaking, using a protein powder type that absorbs a lot of moisture (like some isolates), or inaccurate measurement of dry ingredients (too much flour/protein). Try reducing bake time slightly, ensure accurate measurements (weighing is best!), or consider adding a tablespoon of extra liquid (milk, applesauce) if using a notoriously dry powder.
- Q3: Can I make these protein cookies vegan? A3: Absolutely! Use a plant-based protein powder blend (pea, soy, rice, hemp), a flax egg (1 tbsp ground flaxseed + 3 tbsp water, rested 5 mins) instead of the chicken egg, ensure your nut butter and chocolate chips are vegan, and use maple syrup.
- Q4: How much protein is really in each cookie? A4: It varies significantly based on the protein powder used (check the scoop size and protein per scoop on your container) and the final number of cookies you make. Our estimate is 8-12g per cookie, but calculate based on your specific powder’s nutritional info divided by your cookie yield for accuracy.
- Q5: Can I make these cookies without any sweetener? A5: You can, but they will lack sweetness and the liquid sweetener also contributes moisture. If omitting maple syrup/honey, you’ll likely need to replace that liquid volume with something like unsweetened applesauce, mashed banana (will add flavour), or milk to maintain dough consistency. The cookies will taste significantly different.
- Q6: My protein cookie dough is really sticky/hard to handle. What can I do? A6: Protein dough is often thicker or stickier than regular dough. If it’s overly sticky, try chilling the dough for 15-30 minutes. This helps firm up the fats and makes it easier to scoop. You can also lightly wet your hands or cookie scoop with water to prevent sticking.