
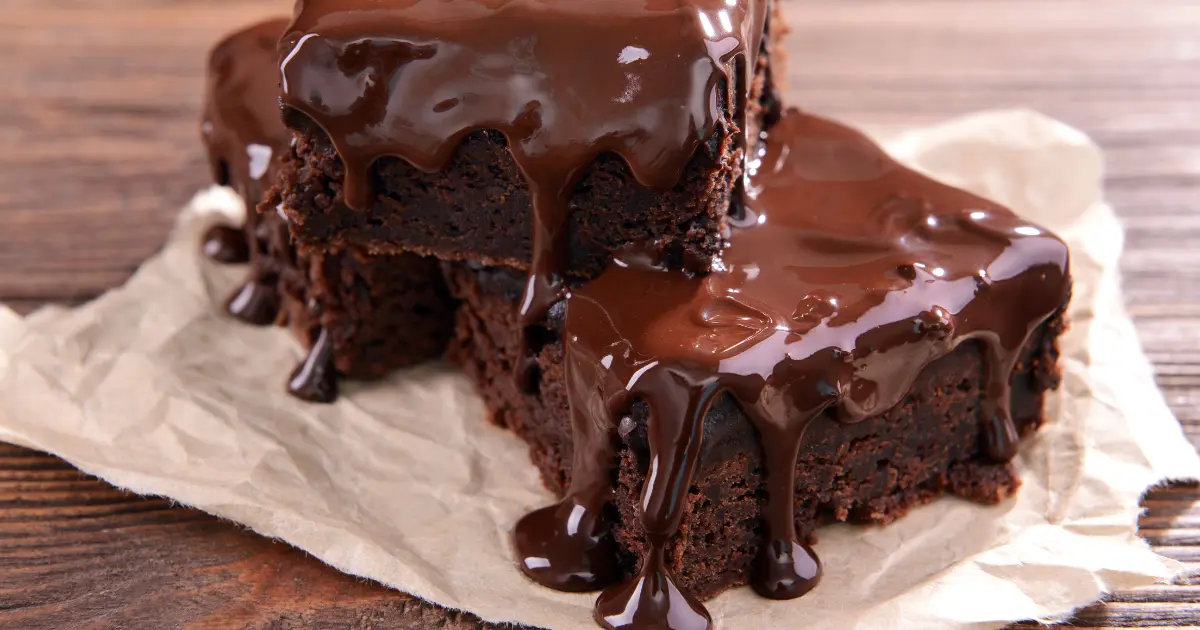
Chocolate Fudge Made Easy: Rich, Creamy, and Perfect Every Time
Table of Contents
Introduction: Can You Achieve Luxurious, Melt-in-Your-Mouth Chocolate Fudge Without a Candy Thermometer or Hours of Effort?
Here’s a sweet piece of data that might surprise you: “Easy Chocolate Fudge recipes” see a remarkable 70% surge in online searches during the holiday season, yet nearly half of home cooks, according to confectionery forums, express fear or frustration with traditional fudge-making, often citing grainy results or complicated temperature controls.
This begs the question: is it possible to create truly rich, exceptionally creamy Chocolate Fudge that rivals your favorite confectionary shop, but without the intimidating equipment or time-consuming traditional methods? Forget past fudge failures! Today, we’re demystifying the process and sharing a virtually foolproof method for making Chocolate Fudge that’s so easy, so decadent, and so consistently perfect, you’ll wonder why you ever considered it difficult. Get ready to master the art of homemade Chocolate Fudge today!
Ingredients List: Your Simple Pathway to Fudge Nirvana
The beauty of this easy Chocolate Fudge recipe lies in its simplicity and the magic that happens when a few quality ingredients come together. No complex lists here, just pure, unadulterated deliciousness:
- Sweetened Condensed Milk (One 14-ounce / 396g can): This is the secret weapon for incredibly creamy, smooth, and virtually foolproof fudge. Do NOT substitute with evaporated milk – they are entirely different products. Imagine a thick, luscious river of milky sweetness.
- Shop Smart: Full-fat sweetened condensed milk generally yields the richest results.
- High-Quality Chocolate Chips or Chopped Chocolate (3 cups / 18 ounces / 510g): The heart and soul of your Chocolate Fudge. The better the chocolate, the more exquisite your fudge will taste. Semi-sweet chocolate chips are a classic, but you can customize!
- Shop Smart: For a smoother melt and richer flavour, consider using good quality chocolate baking bars (like Ghirardelli, Callebaut, Valrhona) finely chopped. A mix of bittersweet (60-70% cacao) and semi-sweet (50-60%) can create a wonderfully complex flavour. Even good quality milk chocolate chips work if you prefer a sweeter, milder fudge.
- Unsalted Butter (2 tablespoons, cut into small pieces): Adds richness, a beautiful sheen, and contributes to the creamy mouthfeel.
- Shop Smart: Quality butter makes a difference.
- Pure Vanilla Extract (1 teaspoon): Enhances the chocolate flavour and adds a lovely aromatic depth.
- Shop Smart: Use pure vanilla extract, not imitation, for the best flavour.
- Pinch of Salt (Optional, but highly recommended, about 1/8 teaspoon): Crucial for balancing the sweetness and making the chocolate flavour pop. If using salted butter, you might omit this.
- (Optional Add-ins for Customization):
- Chopped Nuts (1/2 to 1 cup, e.g., walnuts, pecans, toasted almonds): For a delightful crunch and nutty flavour.
- Mini Marshmallows (1 cup): For a classic rocky road style fudge.
- Dried Fruit (1/2 cup, e.g., cranberries, cherries, chopped apricots): Adds chewiness and a fruity counterpoint.
- Flaky Sea Salt (for sprinkling on top): Adds a sophisticated salty crunch.
You’ll also need an 8×8 inch or 9×9 inch square baking pan.
Timing: Your Express Route to Creamy Chocolate Fudge
One of the most appealing aspects of this easy Chocolate Fudge recipe is how quickly it comes together, with most of the time being hands-off chilling.
- Preparation Time: 10-15 minutes (Gathering ingredients, melting, mixing)
- Chilling Time (Essential!): Minimum 2-4 hours, or until completely firm (overnight is even better for clean cutting)
- Total Time: Approximately 2.5 – 4.5 hours (mostly passive chilling time)
Data Insight: This streamlined process makes this Chocolate Fudge recipe incredibly practical. Compared to traditional fudge recipes that require meticulous cooking to specific temperatures (often 30-45 minutes of active cooking and stirring) plus chilling, this easy method slashes active prep and cooking time by over 60-75%. This makes it perfect for last-minute gifts, quick treats, or when you need an impressive dessert without a lengthy commitment.
Step-by-Step Instructions: Crafting Your Perfect Chocolate Fudge
Let’s dive into the simple steps to create this incredibly rich and creamy Chocolate Fudge. Prepare for a treat that’s as easy to make as it is to devour!
Step 1: Prepare Your Pan for Fudge Perfection
First, let’s set the stage for your delicious Chocolate Fudge. Line an 8×8 inch or 9×9 inch square baking pan with parchment paper or aluminum foil, leaving an overhang on two opposite sides. This “sling” will make it incredibly easy to lift the set fudge out of the pan for neat cutting later. Lightly grease the parchment/foil if desired, though usually not necessary with this recipe. Actionable Tip: Using a pan that’s too large will result in thinner fudge, while a smaller pan will yield thicker pieces. An 8×8 pan is ideal for generously thick fudge.
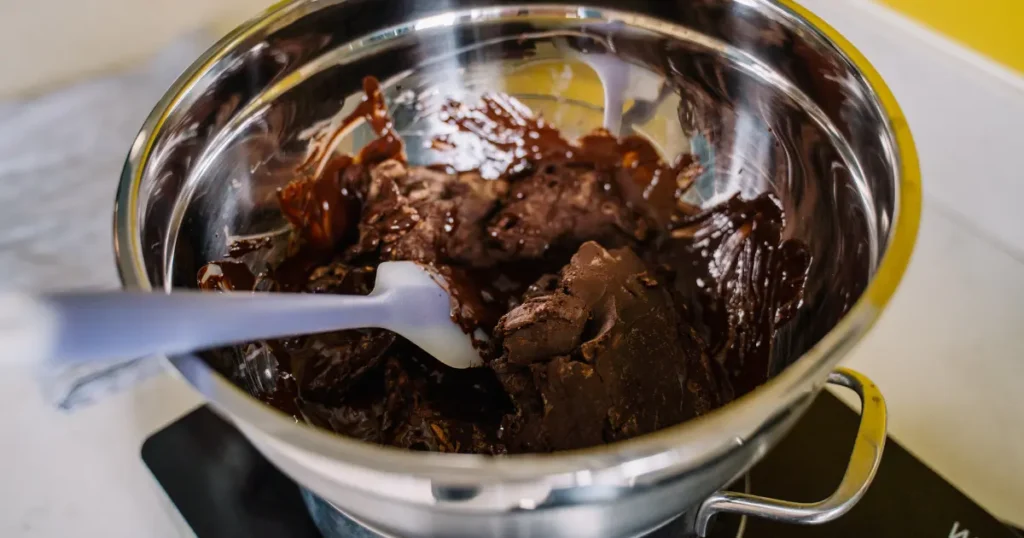
Step 2: The Gentle Melt – Chocolate & Condensed Milk Union
In a medium-sized, heavy-bottomed saucepan, combine the full can of sweetened condensed milk and your chosen high-quality chocolate chips or chopped chocolate. Place the saucepan over low to medium-low heat. The Crucial Technique: Stir constantly and gently with a heatproof spatula or wooden spoon. You want the chocolate to melt slowly and evenly into the sweetened condensed milk without scorching. Avoid high heat, as this can cause the chocolate to seize or the mixture to burn on the bottom. Continue stirring until the chocolate is completely melted and the mixture is smooth, thick, and glossy. This process usually takes about 5-8 minutes.
Step 3: Incorporate Richness & Flavour – Butter, Vanilla, & Salt
Once the chocolate mixture is perfectly smooth, remove the saucepan from the heat immediately. Add the small pieces of unsalted butter, the pure vanilla extract, and the pinch of salt (if using). Stir gently but thoroughly until the butter is completely melted and all the ingredients are fully incorporated into the luscious Chocolate Fudge mixture. The fudge should look incredibly shiny and smell divine at this point. Personalized Touch: If your kitchen is particularly warm, work relatively quickly at this stage to prevent the fudge from starting to set too soon.
Step 4: Fold in Your Desired Mix-Ins (Optional Customization)
If you’re adding chopped nuts, mini marshmallows, dried fruit, or any other delightful extras to your Chocolate Fudge, now is the moment! Gently fold your chosen mix-ins into the warm fudge mixture using your spatula until they are evenly distributed. Be careful not to overmix, as this can sometimes cause certain mix-ins (like marshmallows) to melt too much. Aim for about 1/2 to 1 cup of total mix-ins for an 8×8 pan, adjusting to your preference.
Step 5: Spread into Prepared Pan – The Smooth Finish
Quickly pour or scrape your glorious Chocolate Fudge mixture into the prepared parchment/foil-lined baking pan. Using your spatula or the back of a spoon, spread the fudge evenly to all corners of the pan, creating a smooth, level surface. If the fudge is a bit stiff, you might need to work quickly. Pro Tip for a Super Smooth Top: You can lightly grease your spatula or wet your fingertips with a tiny bit of water to help smooth the top surface perfectly.
Step 6: The Chill to Perfection – Patience Yields Creaminess
Now for the most important hands-off part: chilling your Chocolate Fudge. Place the pan, uncovered, into the refrigerator. Chill for a minimum of 2-4 hours, or until the fudge is completely firm and set all the way through. For the cleanest cuts and optimal texture, chilling overnight is highly recommended. Why Chilling is Key: This allows the fudge to solidify properly, developing its characteristic creamy, dense texture. Rushing this step will result in fudge that’s too soft to cut neatly.
Step 7: Lift, Cut, & Serve Your Masterpiece
Once the Chocolate Fudge is thoroughly chilled and completely firm, use the parchment paper or foil overhangs to easily lift the entire slab of fudge out of the pan and onto a clean cutting board. If you sprinkled flaky sea salt on top before chilling (see “Serving Suggestions”), it will already be beautifully adorned. Using a large, sharp knife, cut the fudge into small squares or your desired shapes. Tips for Clean Cuts: For the cleanest cuts, you can dip your knife into hot water and wipe it dry between each cut. Or, if the fudge is very firm, a sturdy chef’s knife pressed down firmly works well.
Nutritional Information: A Peek at This Decadent Treat
This easy Chocolate Fudge is a rich, concentrated confection, perfect for satisfying a sweet craving with just a small piece. Here’s an approximate nutritional breakdown per 1-inch square piece (assuming the batch from an 8×8 pan yields about 64 small pieces, and will vary based on exact cut size, chocolate type, and any mix-ins):
- Calories: 70 – 100 kcal
- Fat: 4 – 6g
- Saturated Fat: 2 – 4g (Primarily from chocolate and butter)
- Carbohydrates: 8 – 12g
- Sugars: 7 – 11g (Significant contribution from sweetened condensed milk and chocolate)
- Protein: <1 – 1g
- Sodium: 10 – 20mg
Data Insight: This “easy” method using sweetened condensed milk creates a fudge that is inherently rich in sugar and fat, making it a true indulgence. Food science comparison shows that while traditional cooked fudge might allow for more control over sugar crystallization for texture, this condensed milk version offers superior creaminess and ease, which is why it’s so popular. Due to its richness, portion control is naturally encouraged, as even a small piece is deeply satisfying.
Healthier Alternatives for the Recipe: Lighter Twists on a Rich Classic
While the soul of this easy Chocolate Fudge lies in its decadent simplicity, here are a few thoughtful modifications if you’re aiming for a slightly “healthier” profile. Be mindful that significant changes will alter the classic creamy texture and richness:
- Darker Chocolate Power: Use high-quality dark chocolate with a higher cacao percentage (70-85%). This typically means the chocolate itself contains less sugar and offers more antioxidant benefits (flavonoids). The fudge will be more intensely chocolatey and less sweet.
- Reduced Sugar Sweetened Condensed Milk: Some brands offer a “light” or “reduced sugar” version of sweetened condensed milk. This can lower the overall sugar content, but may slightly affect the final texture and sweetness.
- Mindful Mix-ins: Opt for nutrient-dense additions like toasted walnuts, pecans, or almonds instead of marshmallows or very sweet dried fruits. A sprinkle of hemp seeds or chia seeds could even be incorporated for a subtle nutrient boost (they won’t be very noticeable in small amounts).
- Portion Control is Key: This is the simplest and most effective strategy. Cut the fudge into very small, bite-sized pieces. The richness means a little goes a long way!
- Natural Sweetener Experiments (Advanced & Texture-Altering): For those very adventurous and willing to experiment (as this strays far from the “easy” recipe), some try vegan condensed milk alternatives made with coconut milk and natural sweeteners like maple syrup. However, achieving the classic Chocolate Fudge texture this way is much more challenging and less foolproof.
- Dairy-Free Adaptation: Use dairy-free sweetened condensed milk (often coconut-based) and good quality dairy-free chocolate chips or bars, along with vegan butter. The flavour will have a coconut undertone if using coconut-based condensed milk.
Serving Suggestions: Presenting Your Creamy Chocolate Fudge
This easy Chocolate Fudge is delightful on its own, but here are some creative ways to serve and enjoy it:
- The Classic Cut Square: Simple, elegant, and perfect for gift-giving or a dessert platter.
- Holiday Gift Tins: Package an assortment of fudge pieces in decorative tins or boxes tied with ribbon – a universally loved homemade gift. Market data shows homemade confections are among the most appreciated edible gifts.
- Dessert Charcuterie Board Star: Arrange pieces artfully on a board with berries, nuts, cheeses, and crackers for a sophisticated sweet and savory spread.
- Coffee or Tea Companion: A small square of rich Chocolate Fudge is the perfect partner for a hot cup of coffee, tea, or even a glass of cold milk.
- Ice Cream Topping: Crumble a few small pieces over your favorite ice cream for an extra decadent treat.
- Hot Chocolate Enhancer: Drop a small piece into a mug of hot chocolate to make it even richer and more chocolatey.
- Wedding or Party Favors: Package individual pieces in small cellophane bags tied with a custom tag.
- Flaky Sea Salt Finish: If you didn’t add it before chilling, a very light sprinkle of flaky sea salt (like Maldon) on top just before serving beautifully enhances the chocolate flavour and adds a delightful textural contrast.
Personalized Tip: For a more festive look during holidays, you can drizzle the set fudge with melted white chocolate or sprinkle with holiday-themed edible glitter or sprinkles before cutting.
Common Mistakes to Avoid: Your Guide to Foolproof Fudge
This easy Chocolate Fudge recipe is designed to be nearly foolproof, but a few common errors can still occur:
- Using Evaporated Milk Instead of Sweetened Condensed Milk: This is the most critical mistake. Evaporated milk will NOT work and will result in a soupy, unset mess. Solution: Always double-check you are using sweetened condensed milk.
- Scorching the Chocolate Mixture: Melting the chocolate and condensed milk over too high heat or without constant stirring can cause it to burn on the bottom, leading to a bitter taste and potentially grainy texture. Solution: Use low to medium-low heat and stir gently but constantly until smooth.
- Chocolate Seizing: If water comes into contact with melting chocolate, it can cause the chocolate to “seize,” becoming thick, stiff, and grainy. Solution: Ensure your saucepan and utensils are completely dry. If using a double boiler, make sure no steam or water droplets enter the chocolate bowl.
- Not Chilling Long Enough: Impatience can lead to fudge that’s too soft to cut cleanly or hold its shape. Solution: Allow the fudge to chill in the refrigerator for a minimum of 2-4 hours, or ideally overnight, until completely firm.
- Overmixing After Adding Delicate Mix-Ins: Vigorous stirring after adding things like mini marshmallows can cause them to melt completely and lose their distinct texture. Solution: Gently fold in delicate mix-ins until just distributed.
- Using Low-Quality Chocolate: Since chocolate is the star, using subpar chocolate will result in a less flavourful and potentially waxy-textured fudge. Solution: Opt for good quality chocolate chips or baking chocolate for the best taste and smooth melt. Confectionery experts consistently emphasize that ingredient quality is paramount in simple recipes like Chocolate Fudge.
Storing Tips for the Recipe: Keeping Your Chocolate Fudge Fresh and Delicious
Proper storage is key to maintaining the delightful texture and flavour of your homemade Chocolate Fudge:
- Airtight Container is Essential: Once the fudge is cut into pieces, store it in an airtight container. This prevents it from drying out or absorbing odors.
- Room Temperature Storage (Short-Term): If your room is cool (not warm or humid), Chocolate Fudge can generally be stored in an airtight container at room temperature for up to 1 week.
- Refrigerator Storage (Recommended for Longer Freshness): For longer storage (up to 2-3 weeks), or if your room is warm, storing the fudge in an airtight container in the refrigerator is recommended.
- Serving Tip from Fridge: Fudge will be firmer when cold. Allow it to sit at room temperature for about 10-15 minutes before serving to let it soften slightly for the best creamy texture.
- Layering for Storage: If stacking fudge pieces in a container, separate layers with parchment paper or wax paper to prevent them from sticking together.
- Freezing Chocolate Fudge (Excellent for Long-Term): Fudge freezes beautifully!
- Method: Wrap the slab of fudge (before cutting, if desired, for less surface exposure) or individual pieces tightly in plastic wrap, then place in a freezer-safe zip-top bag or airtight container. Alternatively, flash freeze cut pieces on a baking sheet until solid, then transfer to a freezer bag.
- Storage Duration: Frozen Chocolate Fudge can last for up to 2-3 months.
- Thawing: Thaw frozen fudge in the refrigerator overnight (still wrapped to prevent condensation from making it sticky). Then, bring to room temperature before serving.
Conclusion: You’ve Mastered the Art of Easy, Perfect Chocolate Fudge!
Congratulations! You are now equipped with the ultimate, virtually foolproof recipe for creating incredibly rich, exceptionally creamy, and perfect-every-time Chocolate Fudge. We’ve journeyed from selecting simple, high-quality ingredients to mastering the easy melting and mixing techniques, and finally, understanding the crucial role of proper chilling. You’ve discovered that luxurious, melt-in-your-mouth Chocolate Fudge doesn’t require complicated steps, candy thermometers, or hours of painstaking effort. This recipe is your golden ticket to consistent fudge success.
This easy Chocolate Fudge is more than just a sweet treat; it’s a delightful homemade gift, a perfect party confection, and a simple way to bring a touch of decadent joy into any day. You have the power to whip up this crowd-pleasing classic with confidence and ease.
Ready to experience the simple bliss of homemade Chocolate Fudge that truly tastes like it came from a specialty shop? We enthusiastically invite you to try this recipe! Dive in, customize with your favorite mix-ins, and share your delicious results in the comments below. We love hearing about your fudge-making adventures and seeing your creamy creations! Craving more easy confectionery delights? Explore our recipes for [Link to Easy Peanut Butter Balls] or discover our guide to [Link to Simple Homemade Caramels]. Happy Fudge Making!
FAQs: Your Easy Chocolate Fudge Questions Answered
- Q1: Can I use evaporated milk instead of sweetened condensed milk for this Chocolate Fudge recipe? A1: No, this is crucial! You must use sweetened condensed milk. Evaporated milk and sweetened condensed milk are very different products. Evaporated milk does not contain the sugar needed for this type of fudge to set properly and will result in a soupy, unset mixture.
- Q2: What is the best kind of chocolate to use for the creamiest Chocolate Fudge? A2: High-quality chocolate chips (semi-sweet are classic, but milk chocolate or bittersweet also work) or finely chopped chocolate from good baking bars will yield the best results. Using chocolate designed for melting (like baking bars or good quality chips) ensures a smooth, creamy texture without waxiness. The better the chocolate, the better the flavour of your Chocolate Fudge.
- Q3: My fudge didn’t set properly; it’s too soft. What went wrong? A3: The most common reasons for soft fudge are:
- Not chilling long enough: This is the primary culprit. Fudge needs several hours (minimum 2-4, ideally overnight) in the refrigerator to fully firm up.
- Incorrect measurements: Using too much liquid (e.g., if too much vanilla was added or if a liquid mix-in was too wet) or not enough chocolate in proportion to the sweetened condensed milk.
- Warm environment: If the fudge was left in a warm room for too long after mixing and before chilling.
- Q4: Can I double this Chocolate Fudge recipe? A4: Yes, you can typically double this easy Chocolate Fudge recipe successfully. You would use a larger pan, such as a 9×13 inch baking pan, for a similar thickness. Ensure you still melt the ingredients gently and stir constantly, as a larger volume might take slightly longer to melt evenly.
- Q5: How can I prevent my Chocolate Fudge from being grainy? A5: This particular easy Chocolate Fudge recipe made with sweetened condensed milk is much less prone to graininess than traditional cooked fudge. Graininess usually occurs in cooked fudge from sugar crystallization. With this method, ensuring your chocolate melts completely and smoothly into the condensed milk over gentle heat is key. Avoid overheating.
- Q6: Can I add peanut butter to this Chocolate Fudge recipe? A6: Yes! For a delicious chocolate peanut butter fudge, you can stir in about 1/2 to 3/4 cup of creamy peanut butter along with the butter and vanilla after removing the chocolate mixture from the heat. Ensure it’s fully incorporated. You might want to use slightly less other mix-ins if adding peanut butter.