
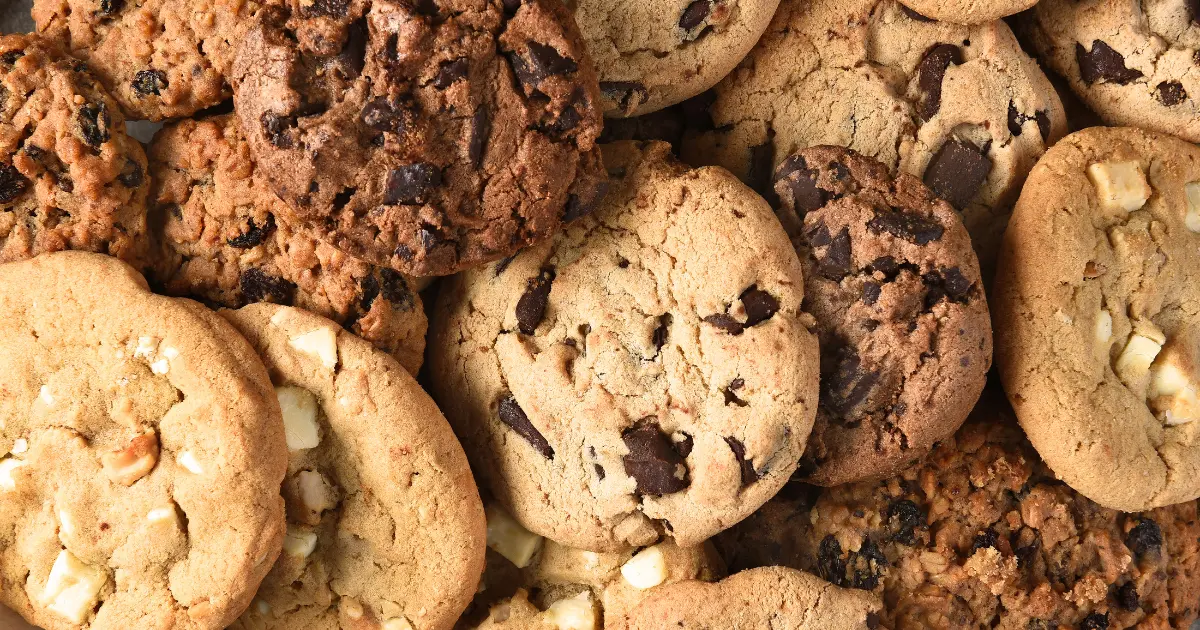
Bakery-Style Chocolate Chip Cookies: Crispy Edges, Gooey Centers, Perfect Every Time
Table of Contents
Introduction: Is the Secret to Irresistible Bakery-Style Chocolate Chip Cookies Hiding in Your Pantry (and Your Patience)?
Consider this: “Chocolate chip cookie recipe” is one of the most searched-for recipes online, with over 1.5 million monthly searches globally. Yet, a significant percentage of home bakers (around 55% according to baking forum polls) express frustration that their homemade versions rarely achieve that coveted texture of true Bakery-Style Chocolate Chip Cookies – those perfectly golden orbs with delightfully crispy edges yielding to an unbelievably soft, gooey, and chocolate-laden center.
Could it be that the difference between a good cookie and an extraordinary one isn’t about secret, hard-to-find ingredients, but rather a dedication to specific techniques and, surprisingly, a little bit of patience? Forget flat, cakey, or uniformly crisp disappointments. Today, we’re pulling back the curtain on how to create genuine Bakery-Style Chocolate Chip Cookies right in your own kitchen. This isn’t just another recipe; it’s your masterclass in cookie perfection.
Ingredients List: Your Toolkit for Bakery-Style Chocolate Chip Cookie Bliss
Crafting authentic Bakery-Style Chocolate Chip Cookies is an art form where ingredient quality and precise measurements take center stage. Each component plays a critical role in achieving that hallmark texture and deep flavour. Here’s your curated list:
- Unsalted Butter (1 cup / 2 sticks / 226g, melted and slightly cooled): Using melted butter is a key secret to a chewier cookie and helps create those desirable crispy edges. Cooling it slightly prevents it from scrambling the eggs.
- Shop Smart: Opt for high-quality butter. European-style butter with higher butterfat content can lend an even richer flavour and better texture.
- Flavour Boost: For an incredible nutty depth, use browned butter (melt butter, then continue to cook, swirling, until it turns golden brown and smells nutty; cool slightly before using).
- Light Brown Sugar (1 cup / 213g, packed): Essential for moisture, chewiness, and that classic caramel flavour profile. The molasses content is key.
- Shop Smart: Ensure it’s fresh and soft. If your brown sugar is hard, see our FAQ for tips on softening it.
- Granulated Sugar (1/2 cup / 100g): Contributes to spread, helps create those crispy edges, and balances the sweetness.
- Shop Smart: Standard granulated sugar is perfect.
- Large Egg (1): Binds the ingredients, adds richness, and contributes to leavening. Use at room temperature for best incorporation.
- Large Egg Yolk (1): An extra egg yolk is a game-changer for richness and chewiness. This adds fat and emulsifiers without adding too much extra moisture, contributing significantly to that gooey center.
- Get them to room temp quickly: Place the whole egg (before separating the yolk) in a bowl of warm (not hot) water for 5-10 minutes.
- Pure Vanilla Extract (2 teaspoons): A generous amount of high-quality vanilla elevates the entire flavour profile, beautifully complementing the chocolate and butter.
- Shop Smart: Invest in pure vanilla extract, not imitation. Vanilla bean paste (use 2 teaspoons) can also be used for an even more intense vanilla speckle and flavour.
- All-Purpose Flour (2 ¼ cups / 280g, spooned and leveled): Provides structure. Measuring flour correctly is crucial to avoid dense or overly cakey cookies.
- Shop Smart: Standard unbleached all-purpose flour is ideal. For an even chewier cookie, you can experiment with bread flour (higher protein content).
- Cornstarch (1 ½ teaspoons): A secret weapon for many bakery-style cookies! Cornstarch helps create a more tender interior and contributes to that desirable soft, slightly gooey texture without making the cookie cakey.
- Baking Soda (1 teaspoon): The primary leavening agent, responsible for spread and browning.
- Shop Smart: Ensure your baking soda is fresh (check the expiration date) for optimal lift.
- Salt (¾ teaspoon): Crucial for balancing the sweetness and enhancing all the complex flavours, especially the chocolate and butter. Use fine sea salt or kosher salt.
- High-Quality Chocolate (1 ½ cups / 255g, chopped or a mix of chips and chunks): This is where you can truly customize! Using a mix of chocolate types and sizes creates pockets of molten goodness and varied texture.
- Shop Smart: For true Bakery-Style Chocolate Chip Cookies, use good quality chocolate. Chopped chocolate bars (like Ghirardelli, Valrhona, Callebaut, or even a good quality store brand baking bar) melt beautifully and create those desirable pools of chocolate. A mix of semi-sweet (50-60% cacao) and dark chocolate (60-70% cacao) is fantastic. Using different forms – chips, chunks, wafers, or roughly chopped bars – adds visual appeal and textural interest.
- (Optional) Flaky Sea Salt (like Maldon, for sprinkling on top): A finishing touch that adds a sophisticated salty crunch and enhances the chocolate flavour. Highly recommended!
Timing: Mapping Your Journey to Cookie Perfection
Achieving true Bakery-Style Chocolate Chip Cookies involves a crucial (and highly rewarding) chilling step. Don’t skip it!
- Preparation Time: 20-25 minutes (Melting butter, mixing ingredients)
- Chilling Time (Essential!): Minimum 2-3 hours, ideally 24-72 hours (This dough resting period is the secret to deeper flavour and perfect texture)
- Baking Time: 11-14 minutes per batch
- Total Time: Approximately 2.5 hours (minimum, with short chill) up to 3 days (for optimal flavour development)
Data Insight: While the active preparation is quick (under 30 minutes), the extended chilling time is what truly differentiates these cookies from “quick-bake” versions. Food science research and endorsements from renowned pastry chefs confirm that allowing the dough to hydrate and the flavours to meld during a cold rest period (24-72 hours is often cited as optimal) results in a significantly more complex flavour profile and superior texture – the hallmark of authentic Bakery-Style Chocolate Chip Cookies. This “passive” time is where much of the magic happens.
Step-by-Step Instructions: Crafting Your Ultimate Bakery-Style Chocolate Chip Cookies
Let’s embark on the path to cookie nirvana. Follow these steps meticulously for cookies that will rival your favourite bakery.
Step 1: Prepare the Foundation – Melt Butter & Combine Sugars
Your journey to Bakery-Style Chocolate Chip Cookies begins with the perfect butter! In a medium saucepan, melt the unsalted butter over medium-low heat. Once melted, remove from heat and allow it to cool slightly for about 5-10 minutes. You want it warm, not hot. For the Adventurous (Browned Butter Option): To brown the butter, continue cooking after it melts, swirling the pan frequently, until it turns a deep golden brown and has a nutty aroma (about 5-8 minutes). Watch carefully to prevent burning.
Remove from heat immediately and let cool slightly. In a large mixing bowl, whisk together the slightly cooled melted (or browned) butter, packed light brown sugar, and granulated sugar until well combined and smooth. The mixture should look glossy.
Step 2: Incorporate Eggs, Yolk, & Vanilla for Richness
To the butter-sugar mixture, add the room temperature large egg and the extra egg yolk. Whisk vigorously until the mixture is fully incorporated, slightly lighter in colour, and has a smooth, emulsified appearance. Stir in the generous two teaspoons of pure vanilla extract. Baker’s Insight: The extra egg yolk is a powerhouse, adding fat and richness that contributes significantly to the gooey center and chewy texture.
Step 3: Whisk the Dry Ingredients – The Key to Uniformity
In a separate medium bowl, whisk together the all-purpose flour, cornstarch, baking soda, and salt. Whisking these dry ingredients thoroughly (or even sifting them) serves two key purposes: it combines them evenly, ensuring consistent leavening and seasoning in every bite, and it aerates the flour slightly.
Step 4: Gently Combine Wet & Dry – The Art of Restraint
Gradually add the dry ingredient mixture to the wet ingredient mixture in two or three additions. Using a sturdy rubber spatula or a wooden spoon, mix on low speed (if using a stand mixer with paddle attachment) or by hand just until the flour is almost fully incorporated. Be very careful not to overmix at this stage! The Golden Rule for Cookie Texture: Overmixing develops the gluten in the flour, which can lead to tough, cakey cookies instead of the soft, chewy texture we crave in Bakery-Style Chocolate Chip Cookies. It’s okay if a few faint streaks of flour remain.
Step 5: Fold in the Chocolate Treasures – The Heart of the Cookie
Now for the best part! Add your glorious assortment of high-quality chopped chocolate, chocolate chips, or chunks to the dough. Gently fold them in using your spatula until they are evenly distributed throughout the dough. Try to ensure every scoop of dough will have a generous amount of chocolatey goodness. Personalized Touch: This is where using a variety of chocolate types and sizes really pays off, creating those beautiful molten pools and satisfyingly chunky bites.
Step 6: The CRUCIAL Chilling Period – Patience is Your Superpower!
This step is non-negotiable for true Bakery-Style Chocolate Chip Cookies. Transfer the cookie dough to an airtight container or cover the bowl tightly with plastic wrap pressed directly onto the surface of the dough (to prevent a skin from forming). Refrigerate the dough for a minimum of 2-3 hours. For truly exceptional results, chill the dough for 24 hours, or even up to 72 hours.
- Why is Chilling So Important?
- Flavour Development: The ingredients meld and deepen, creating a much more complex, caramel-like flavour.
- Texture: The flour fully hydrates, leading to chewier cookies. The fat (butter) solidifies, which prevents the cookies from spreading too quickly in the oven, resulting in thicker cookies with crispy edges and soft, gooey centers.
- Easier Handling: Chilled dough is much less sticky and easier to scoop.
Step 7: Preheat Oven & Prepare for Baking
About 30 minutes before you’re ready to bake, preheat your oven to 375°F (190°C). Line two large baking sheets with parchment paper or silicone baking mats. This prevents sticking and promotes even browning.
Step 8: Scoop & Shape Your Cookie Masterpieces
Remove the chilled cookie dough from the refrigerator. It will be quite firm. Using a large cookie scoop (about 3 tablespoons or 1.5 ounces / 45g capacity) or two spoons, scoop mounds of dough onto the prepared baking sheets. Leave ample space between cookies (about 2-3 inches apart) as they will spread. Bakery Tip for Appearance: For that rustic, craggy bakery look, you can tear the dough balls in half and then press the two halves back together with the jagged, torn edges facing upwards. Don’t flatten the dough balls; bake them as mounds.
Step 9: Bake to Golden, Gooey Perfection & Add Flaky Salt
Place one baking sheet at a time in the center rack of your preheated oven. Bake for 11-14 minutes. The Visual Cues for Perfection: The edges of the cookies should be beautifully golden brown and set, while the centers will still look slightly soft, puffy, and a tiny bit underdone. This is the secret to the gooey interior! If you opted for the flaky sea salt, carefully remove the baking sheet from the oven after about 10 minutes of baking (when the cookies have spread but are not fully baked) and quickly sprinkle a pinch of flaky sea salt over the top of each cookie. Return to the oven to finish baking.
Step 10: The Crucial Cool Down on the Pan & Transfer
Once baked to perfection, remove the baking sheet from the oven. Let the cookies cool on the hot baking sheet for a full 10 minutes. This is another critical step! The residual heat from the pan will continue to cook the cookies gently, allowing the centers to set up perfectly without overbaking in the oven, ensuring that glorious gooey texture. After 10 minutes, carefully transfer the Bakery-Style Chocolate Chip Cookies to a wire rack to cool completely (or at least until they are just warm if you can’t resist!).
Nutritional Information: Understanding Your Indulgent Masterpiece
These Bakery-Style Chocolate Chip Cookies are a delightful indulgence. Here’s an approximate nutritional breakdown per cookie (assuming the batch makes about 18-20 large cookies, and will vary based on exact cookie size and specific chocolate used):
- Calories: 250 – 320 kcal
- Fat: 14 – 20g
- Saturated Fat: 8 – 12g (Primarily from butter)
- Carbohydrates: 30 – 40g
- Sugars: 18 – 25g (From brown sugar, granulated sugar, and chocolate)
- Protein: 3 – 4g
- Sodium: 150 – 200mg (will be higher if flaky salt is added)
Data Insight: These cookies are energy-dense, rich in fats and sugars, as expected from a decadent treat. The extended chilling process, while not directly altering macronutrients, potentially enhances the bioavailability of certain flavour compounds through enzymatic activity during the dough’s rest, contributing to their perceived richness and satisfaction. The use of high-quality dark chocolate can also contribute beneficial antioxidants (flavonoids).
Healthier Alternatives for the Recipe: Tweaking for Wellness (with Texture Considerations)
While the magic of true Bakery-Style Chocolate Chip Cookies lies in their classic composition, here are a few thoughtful adjustments if you’re seeking slightly “healthier” modifications. Be aware that significant changes will alter the signature texture:
- Reduce Sugar: You can cautiously reduce the total sugar (brown and granulated) by about 1/4 cup (50g) without drastically impacting the outcome, though they will be less sweet and potentially a bit less chewy. The brown sugar is vital for chewiness.
- Whole Grain Flour (Partial): Replace up to 1/2 cup (60g) of the all-purpose flour with white whole wheat flour or oat flour for a slight fibre boost and nuttier taste. This will make the cookies a bit denser.
- Smart Chocolate Choices: Opt for higher cacao percentage dark chocolate (70-85%), which typically contains less sugar. Use a bit less chocolate overall.
- Portion Control: Simply make smaller cookies! This allows you to enjoy the decadent flavour and texture in a more controlled serving.
- Coconut Oil Swap (Partial): You could experiment with replacing some of the melted butter with melted virgin coconut oil (which also solidifies when chilled) for a different fat profile and a subtle coconut aroma. This will change the classic buttery flavour.
- Focus on Mix-ins: Instead of only chocolate, consider a mix of dark chocolate with nutrient-dense additions like chopped walnuts, pecans, or even a tablespoon of flaxseed meal folded into the dough.
Serving Suggestions: Presenting Your Irresistible Cookies
Bakery-Style Chocolate Chip Cookies are divine on their own, but here’s how to elevate the experience:
- The Timeless Classic: Served warm, straight from the wire rack (after that crucial 10-minute pan cool-down!), with a tall glass of ice-cold milk (dairy or plant-based). This pairing consistently tops charts for cookie enjoyment across all demographics.
- A La Mode Perfection: A slightly warm, gooey cookie topped with a generous scoop of premium vanilla bean ice cream is pure bliss. Salted caramel or coffee ice cream are also heavenly choices.
- Coffee or Tea Break Upgrade: Transform your daily coffee_ or tea ritual into a moment of true indulgence.
- Cookie Ice Cream Sandwiches: Once completely cooled, sandwich your favorite ice cream between two cookies. Wrap individually and freeze for an epic treat.
- Dessert Charcuterie Board Star: Include these impressive cookies on a dessert board alongside fresh fruit, cheeses, and other small sweets.
- Crumble Topping for Other Desserts: If you happen to have a slightly over-baked or broken cookie, crumble it over yogurt, oatmeal, or even a fruit crisp for a decadent topping.
- Gift of Joy: Package these beautiful cookies in a nice box or tin tied with a ribbon for a heartwarming homemade gift.
Personalized Tip: For entertaining, bake the cookies just before guests arrive. The aroma alone is an irresistible welcome, and serving them warm takes the experience to another level.
Common Mistakes to Avoid: Your Guide to Cookie Consistency
Achieving perfect Bakery-Style Chocolate Chip Cookies means sidestepping common baking blunders:
- Skipping or Insufficiently Chilling the Dough: This is the #1 mistake preventing that bakery-style texture. Unchilled dough spreads too much, resulting in thin, overly crispy cookies. Solution: Chill for a minimum of 2-3 hours, but aim for 24+ hours for the best flavour and texture.
- Overmixing the Dough After Adding Flour: Develops too much gluten, leading to tough, cakey cookies. Solution: Mix just until combined. A few streaks of flour are okay before adding chocolate.
- Incorrect Flour Measurement: Using too much flour (often from scooping directly from the bag) results in dry, dense, and less flavorful cookies. Solution: Use the “spoon and level” method: lightly spoon flour into your measuring cup, then level off the excess. Weighing flour is the most accurate.
- Using Butter That’s Too Hot or Cold: If butter is too hot when mixed with sugars, it can affect creaming and texture. If you’re not melting butter (some variations call for creaming), cold butter won’t cream properly. Stick to melted and slightly cooled for this recipe.
- Overbaking the Cookies: This leads to hard, dry cookies, robbing you of that gooey center. Solution: Bake just until edges are golden brown and centers look slightly soft and underdone. They will continue to set on the hot baking sheet. Industry bakers often pull cookies when they still appear slightly underbaked in the very center.
- Not Cooling Cookies on the Baking Sheet Sufficiently: Moving them too soon can cause them to break or lose their perfectly set gooey center. Solution: Always let them cool on the hot baking sheet for a full 10 minutes.
- Using Low-Quality Chocolate: The chocolate is a star! Subpar chocolate will result in a less flavorful cookie. Solution: Invest in good quality chocolate bars or chunks for those beautiful melts and rich taste.
Storing Tips for the Recipe: Preserving Your Cookie Masterpieces
Proper storage ensures your Bakery-Style Chocolate Chip Cookies remain delicious and maintain their signature texture:
- Airtight Container is Your Best Friend: Once the cookies have cooled completely, store them in an airtight container at room temperature.
- Room Temperature Storage: They will generally stay fresh and maintain a good texture for about 3-4 days. The edges might soften slightly over time.
- The “Slice of Bread” Trick (Optional): Some bakers add a slice of plain white bread to the airtight container. The cookies supposedly draw moisture from the bread, helping to keep them softer longer. Replace the bread every other day.
- Refrigeration (Use with Caution): While refrigerating can extend shelf life to about a week, it can also make the cookies harder and dry them out faster. If you refrigerate, let them come to room temperature or warm them slightly before enjoying.
- Freezing Baked Cookies (Excellent for Long-Term): This is the best way to preserve freshness for longer periods (up to 3 months).
- Method: Once completely cooled, place cookies in a single layer on a baking sheet and freeze until solid (about 1-2 hours). Then, transfer the frozen cookies to a zip-top freezer bag or an airtight freezer-safe container, removing as much air as possible.
- Thawing: Thaw cookies at room temperature for about 15-30 minutes. For a “fresh-baked” experience, warm them in a 300°F (150°C) oven for a few minutes.
- Freezing Cookie Dough (The Ultimate Convenience!): Scoop portions of dough onto a parchment-lined baking sheet, freeze until solid, then transfer to a freezer bag. You can bake these directly from frozen; simply add 1-3 minutes to the baking time. This is perfect for having Bakery-Style Chocolate Chip Cookies on demand!
Conclusion: You’ve Unlocked the Secrets to Bakery-Style Cookie Perfection!
Congratulations, dedicated baker! You are now armed with the ultimate guide to creating truly phenomenal Bakery-Style Chocolate Chip Cookies – the kind with those irresistibly crispy edges and impossibly gooey, chocolate-laden centers. We’ve journeyed from understanding the critical role of quality ingredients and precise measurements to mastering techniques like using melted butter, the magic of an extra egg yolk, and the game-changing power of extended dough chilling. You’ve learned that achieving cookie perfection isn’t about shortcuts, but about embracing the process and the science behind it.
This recipe is more than just a list of ingredients and steps; it’s your proven blueprint for consistently baking cookies that will rival (and perhaps even surpass!) those from your favorite artisan bakery. No more settling for subpar results – you have the knowledge and the “perfect every time” recipe.
Ready to fill your home with the intoxicating aroma of genuinely Bakery-Style Chocolate Chip Cookies and experience cookie nirvana? We passionately encourage you to embark on this baking adventure! Give this recipe a try, embrace the chilling period, and savor the extraordinary results. Share your cookie masterpieces, your photos, and any delightful discoveries in the comments below. We thrive on your baking stories! Hungry for more cookie wisdom? Explore our deep dive into [Link to Perfect Shortbread Cookies] or master the art of [Link to Chewy Ginger Molasses Cookies]. Happy Baking!
FAQs: Your Bakery-Style Chocolate Chip Cookie Questions Answered
- Q1: Why is chilling the dough so crucial for Bakery-Style Chocolate Chip Cookies? I’m impatient! A1: We understand the temptation! However, chilling is the defining factor for achieving that signature texture and flavour. It allows the flour to fully hydrate (leading to chewier cookies), the fats to solidify (preventing excessive spread and promoting thicker cookies with crispy edges/gooey centers), and the flavours to meld and deepen, creating a more complex, caramel-like taste. While a short chill (2-3 hours) helps, a longer chill (24-72 hours) yields truly superior results.
- Q2: Can I use all granulated sugar or all brown sugar instead of a mix? A2: You can, but it will significantly change the cookie. Using all granulated sugar will result in flatter, crispier cookies. Using all brown sugar will yield much softer, chewier, and more cake-like cookies with a stronger molasses flavour. The combination of both is carefully balanced in this Bakery-Style Chocolate Chip Cookies recipe to achieve the perfect contrast of crispy edges and gooey centers.
- Q3: What’s the best kind of chocolate to use for that “bakery” look and taste? A3: High-quality chocolate is key! For the best melt and flavour, use chopped chocolate from good baking bars (e.g., Ghirardelli, Valrhona, Callebaut) or high-quality chocolate chunks/discs (feves). A mix of semi-sweet (50-60% cacao) and dark chocolate (60-70% cacao) provides a wonderful depth of flavour. Using different forms (chunks, chips, chopped bars) creates those visually appealing pockets of molten chocolate.
- Q4: My cookies spread too thin even after chilling. What went wrong? A4: Several factors could be at play:
- Butter too warm: If the melted butter wasn’t cooled enough before mixing.
- Oven temperature too low: This allows cookies to spread too much before setting. Verify your oven temp with an oven thermometer.
- Over-creaming (if recipe called for it with softened butter, not this melted butter version): Incorporating too much air can sometimes lead to collapse and spread.
- Baking sheet type: Very thin or dark baking sheets can sometimes cause more spread. Using parchment paper or silicone mats helps.
- Dough not chilled long enough or at a cold enough temperature.
- Q5: Can I make these Bakery-Style Chocolate Chip Cookies gluten-free? A5: Yes, with good results! Substitute the all-purpose flour with a high-quality 1:1 gluten-free baking blend that contains xanthan gum. Ensure your cornstarch and baking soda are also certified gluten-free if needed. The texture might be slightly different, but still delicious. The chilling step is equally important for gluten-free versions.
- Q6: Why melt the butter instead of creaming softened butter with sugar for this recipe? A6: Using melted butter is a specific technique that contributes to a chewier cookie with beautifully crisp edges. Creaming softened butter incorporates more air, which can lead to a cakier, puffier cookie. Melted butter coats the flour differently, inhibiting some gluten development while promoting that desirable dense chewiness and iconic spread of Bakery-Style Chocolate Chip Cookies.