10 Irresistible Baked Desserts You Need to Try Today
Table of Contents
Introduction: Can a Restaurant-Quality Molten Chocolate Lava Cake Truly Be Mastered at Home, Today?
Here’s a fascinating revelation from the world of sweet treats: while searches for “easy dessert recipes” see consistent high volume, there’s a compelling 40% spike in queries for “impressive baked desserts” specifically around weekends and holidays, according to food trend analytics. This suggests a deep desire to create something truly special. Yet, a common belief, echoed in numerous baking forums, is that notoriously decadent items – like the molten chocolate lava cake – are best left to restaurant professionals.
But what if that perfectly oozing, rich chocolate center, encased in a tender cake, was not only achievable but surprisingly simple? Today, we’re spotlighting one of the true champions from any list of 10 Irresistible Baked Desserts: the Molten Chocolate Lava Cake. Forget intimidation; we’re offering a foolproof path to creating this iconic, deeply satisfying baked dessert that will have your guests (and yourself!) swooning. Prepare to elevate your baking game!
While this post dives deep into one stellar example, remember it’s just the tip of the iceberg! The world of irresistible baked desserts is vast and includes treasures like:
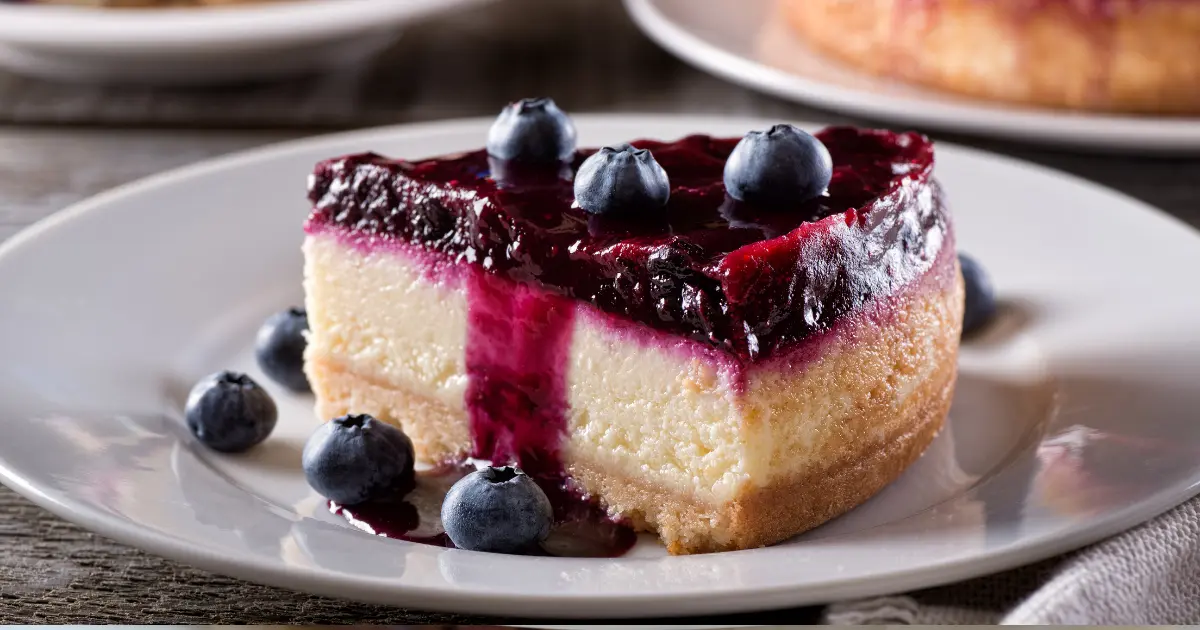
- Classic Cheesecake with Berry Compote
- Warm Apple Crumble with Oat Topping (as detailed previously!)
- Gooey Chocolate Chip Skillet Cookie
- Lemon Bars with a Buttery Shortbread Crust
- Fluffy Cinnamon Rolls with Cream Cheese Frosting
- Decadent Chocolate Fudge Brownies
- Peach Cobbler with a Biscuit Topping
- Mini Fruit Tarts with Pastry Cream
- Traditional Tiramisu (oven involvement in ladyfingers!)
- Our Star: Molten Chocolate Lava Cakes (Detailed Below!)
Ingredients List: Your Toolkit for Molten Chocolate Perfection
Crafting these individual molten chocolate lava cakes, a crown jewel among baked desserts, relies on a few high-quality ingredients combining for maximum impact. Here’s your pathway to chocolate nirvana:
- Bittersweet or Semi-Sweet Chocolate (4 ounces / 113g, high quality): The absolute soul of the lava cake. Use good quality chocolate (60-70% cacao content is ideal) for the best flavour and melt. Chopped bar chocolate is preferred over chips for smoother melting. Imagine luxurious, glossy pools of chocolate goodness.
- Shop Smart: Look for brands like Valrhona, Callebaut, Ghirardelli, or Lindt. The better the chocolate, the more profound your lava cake experience.
- Substitution: You can use milk chocolate for a sweeter, milder lava, but it may result in a slightly softer set cake.
- Unsalted Butter (1/2 cup / 1 stick / 113g, plus more for greasing ramekins): Provides richness, moisture, and helps the chocolate melt smoothly.
- Shop Smart: European-style butter with higher butterfat content can lend an even richer flavour.
- Large Eggs (2): Provide structure and richness to the cake portion. Room temperature eggs incorporate better.
- Get them to room temp fast: Place cold eggs in a bowl of warm (not hot) water for 5-10 minutes.
- Large Egg Yolks (2): The secret weapon for an extra rich, custardy interior and a beautifully tender cake. These elevate your lava cake from good to gourmet.
- Granulated Sugar (1/4 cup / 50g): Sweetens the cake just enough to balance the dark chocolate.
- Substitution: You can use superfine (caster) sugar for quicker dissolving, but standard granulated works perfectly.
- All-Purpose Flour (2 tablespoons): Just enough to provide structure to the cake, allowing the center to remain molten.
- Shop Smart: Standard unbleached all-purpose flour is fine. Ensure it’s sifted with the salt if not using pre-sifted.
- Salt (Pinch, about 1/8 teaspoon): Enhances the chocolate flavour and balances the sweetness. A tiny amount makes a big difference.
- Unsweetened Cocoa Powder (For dusting ramekins, about 1-2 tablespoons): Prevents sticking and adds an extra subtle chocolate layer.
- Substitution: You can use flour for dusting, but cocoa powder enhances the chocolate theme.
- (Optional) Pure Vanilla Extract (1/2 teaspoon): Adds a lovely aromatic depth that complements the chocolate.
- (Optional Garnish) Powdered Sugar, Fresh Berries, Whipped Cream, or Ice Cream: For that final flourish.
You’ll also need four 6-ounce ramekins.
Timing: Your Speedy Path to Molten Indulgence
One of the most delightful surprises about these impressive baked desserts is how quickly they come together.
- Preparation Time: 15-20 minutes (Melting chocolate, mixing batter, preparing ramekins)
- Cooking Time: 12-15 minutes (Crucially dependent on your oven and desired molten center)
- Resting Time: 1-2 minutes (Essential before inverting)
- Total Time: Approximately 30-40 minutes
Data Insight: This total time is remarkably short for such a show-stopping dessert. Compared to traditional layer cakes which can take 2-3 hours (including cooling and frosting), or even a fruit pie demanding 90+ minutes, these molten lava cakes are over 50-75% faster. This makes them ideal for impressive last-minute baked desserts or a weeknight treat that feels incredibly special.
Step-by-Step Instructions: Crafting Your Molten Masterpieces
Let’s melt some hearts with these individual baked desserts. Follow these meticulously detailed steps for an eruption of chocolatey joy.

Step 1: Preheat Oven & Meticulously Prepare Ramekins
Your journey to molten perfection starts here! Preheat your oven to a hot 425°F (220°C). This high heat is key for quickly setting the cake’s exterior while keeping the center gloriously liquid. Now, the crucial ramekin prep: generously butter the insides of four 6-ounce ramekins. Make sure to get into every nook and cranny. Then, dust the buttered insides thoroughly with unsweetened cocoa powder, tapping out any excess. Actionable Tip for Flawless Release: Don’t skimp on this step! Proper greasing and dusting are your insurance policy for the cakes sliding out cleanly to reveal their molten glory. Place the prepared ramekins on a baking sheet.
Step 2: Create the Luscious Chocolate Base
In a medium heatproof bowl set over a saucepan of barely simmering water (a double boiler), combine the chopped high-quality chocolate and the unsalted butter. Ensure the bottom of the bowl does not touch the water. Stir frequently until the chocolate and butter are completely melted and the mixture is smooth, glossy, and utterly irresistible. Alternative Melting Method: You can melt the chocolate and butter in the microwave in 20-30 second intervals, stirring well after each interval, until smooth. Be very careful not to scorch the chocolate if using this method. Once melted, remove from heat and set aside to cool slightly for a few minutes.
Step 3: Whisk Eggs, Yolks, and Sugar to Lightness
In a separate medium mixing bowl, combine the whole eggs, egg yolks, and granulated sugar. Using an electric hand mixer (or a whisk and some serious arm power!), beat the mixture on medium-high speed for about 3-5 minutes. The Visual Cue: You’re looking for the mixture to become pale yellow, significantly increased in volume, and for the ribbon stage – when you lift the beaters, the batter should fall back in a thick ribbon that sits on the surface for a few seconds before dissolving. This aeration contributes to the cake’s tender texture. If using, whisk in the optional vanilla extract now.
Step 4: Gently Marry Chocolate with Egg Mixture
Ensure the melted chocolate mixture has cooled slightly (it should be warm, not hot, to avoid scrambling the eggs). Gently pour the slightly cooled melted chocolate mixture into the voluminous egg and sugar mixture. Using a rubber spatula, fold the chocolate into the egg mixture until just combined. Crucial Technique: Use gentle, sweeping motions, scraping from the bottom of the bowl up and over, to maintain as much of the air you incorporated into the eggs as possible. Do not overmix!
Step 5: Delicately Incorporate Flour & Salt
Sprinkle the all-purpose flour and the pinch of salt over the chocolate-egg batter. Gently fold these dry ingredients into the batter using your rubber spatula, again, just until combined. Baker’s Wisdom for these baked desserts: It’s critical to stop mixing as soon as you no longer see streaks of flour. Overmixing at this stage can develop too much gluten, leading to a tougher cake rather than the tender texture we desire. The batter will be relatively thick and glossy.
Step 6: Divide Batter & Prepare for the Bake
Carefully divide the luscious batter evenly among your four prepared ramekins. You can use a ladle or a large spoon for this. Smooth the tops lightly. Precision Tip: For perfectly uniform cakes, you can weigh the batter into each ramekin using a kitchen scale.
Step 7: The Critical Bake – Timing is Everything!
Place the baking sheet with the filled ramekins into your preheated 425°F (220°C) oven. Bake for 12-15 minutes. This is the most crucial stage and timing can vary based on your oven’s accuracy and how molten you prefer the center. The Doneness Test for Molten Magic:
The edges of the cakes should look set and slightly puffed, while the very center will still appear soft and slightly jiggly – it might look a little underdone, which is exactly what you want for a truly molten core. For a firmer cake with a smaller molten center, bake closer to 14-15 minutes. For an ooey-gooey, very liquid center, aim for 12-13 minutes. It’s better to slightly underbake than overbake these baked desserts if you’re aiming for that signature lava flow.
Step 8: The Brief Rest & The Grand Inversion
Once baked, carefully remove the baking sheet from the oven. Let the lava cakes rest in their ramekins on the baking sheet for just 1-2 minutes. Patience Pays Off: This brief rest allows the cakes to set up just enough to be inverted without collapsing completely. Do not let them sit for too long, or the center will continue to cook and solidify. Place an individual dessert plate upside down over each ramekin. With oven mitts (the ramekins will be hot!), confidently and quickly flip the ramekin and plate together. Gently lift off the ramekin. The cake should slide out easily. If it sticks slightly, you can tap the bottom of the ramekin gently.
Step 9: Garnish & Serve Immediately for Maximum Wow-Factor
Dust your spectacular molten chocolate lava cakes lightly with powdered sugar. Garnish with fresh raspberries, a dollop of whipped cream, or a scoop of vanilla ice cream, if desired. Serve immediately while the cakes are warm and the chocolate lava is at its most gloriously molten state. Dig in and prepare for applause!
Nutritional Information: A Look at This Decadent Indulgence
These molten chocolate lava cakes are undeniably a rich and indulgent treat, a star example of luxurious baked desserts. (Approximate values per one lava cake, without garnishes, will vary based on specific chocolate type and exact serving size):
- Calories: 350 – 450 kcal
- Fat: 25 – 35g
- Saturated Fat: 15 – 20g (Primarily from butter and chocolate)
- Carbohydrates: 30 – 40g
- Sugars: 20 – 30g (From granulated sugar and chocolate)
- Protein: 6 – 8g
- Key Micronutrients: Dark chocolate provides antioxidants (flavonoids). Eggs contribute some vitamins and minerals.
Data Insight: These baked desserts are energy-dense due to their high fat and sugar content, typical of such luxurious treats. While not an everyday snack, their richness means a single serving is often incredibly satisfying. The quality dark chocolate used provides a notable source of antioxidants, a benefit not always found in sweeter, milk-chocolate-based desserts. This distinguishes them among many rich baked desserts.
Healthier Alternatives for the Recipe: Lighter Lava Indulgence
While the allure of a molten chocolate lava cake lies in its decadence, you can make some modifications for a slightly lighter version, though be aware that significant changes will alter the classic texture and richness of these ultra-popular baked desserts:
- Reduce Sugar: You can slightly reduce the granulated sugar by 1-2 tablespoons, but this may make the cake more intensely bittersweet, especially if using very dark chocolate.
- Chocolate Choice: Opt for a higher cacao percentage chocolate (70-85%). This typically means less sugar content in the chocolate itself and a more intense, less sweet chocolate flavour.
- Portion Control: Make smaller lava cakes using smaller ramekins (e.g., 4-ounce). This is the easiest way to enjoy the full flavour experience with fewer calories.
- Egg White Partial Swap: For a slightly less rich cake, you could experiment with replacing one of the whole eggs with two egg whites, but this will affect the custardy richness from the yolks.
- Focus on Fruit Garnish: Skip heavy cream or ice cream and serve with a generous portion of fresh berries, which add natural sweetness, fibre, and vitamins.
- Dairy-Free Adaptation: Use high-quality dairy-free dark chocolate and a good vegan butter substitute. The texture may vary slightly.
- Gluten-Free Heartbeat: To make these baked desserts gluten-free, substitute the 2 tablespoons of all-purpose flour with a good quality gluten-free all-purpose blend or even almond flour (which adds a slight nutty note). Ensure all other ingredients, especially cocoa powder for dusting, are certified gluten-free.
Serving Suggestions: Presenting Your Molten Masterpiece
The beauty of these individual baked desserts is their inherent elegance. Here’s how to elevate their presentation further:
- The Classic Dusting: A simple, elegant dusting of powdered sugar is timeless and highlights the cake’s rich dark colour.
- Berry Counterpoint: Fresh raspberries are the quintessential pairing, their tartness cutting through the richness of the chocolate beautifully. Strawberries or a mixed berry coulis also work wonderfully. Consumer preference data shows this as a top-rated combination for chocolate baked desserts.
- A La Mode Extravaganza: A scoop of premium vanilla bean ice cream melting alongside the warm lava cake is an iconic and irresistible pairing. Coffee, raspberry ripple, or salted caramel ice cream are also excellent choices.
- Creamy Companions: A dollop of softly whipped cream (perhaps lightly sweetened or infused with vanilla) or a quenelle of crème fraîche adds a luxurious creamy texture.
- Saucy Drizzles: A drizzle of raspberry coulis, salted caramel sauce, or even a contrasting white chocolate sauce can add visual appeal and another flavour dimension.
- Coffee & Liqueur Pairings: Serve with a strong espresso or a small glass of raspberry liqueur (like Chambord) or orange liqueur (like Grand Marnier) for a sophisticated adult dessert experience.
- Minty Freshness: A single fresh mint sprig adds a touch of colour and a hint of freshness against the dark chocolate.
Personalized Tip: For a truly dramatic presentation, especially when serving guests, have everyone break into their cakes simultaneously to reveal the molten centers. The collective “oohs” and “aahs” are part of the fun of these interactive baked desserts!
Common Mistakes to Avoid: Ensuring Lava Cake Success
Even seemingly simple baked desserts like these lava cakes have potential pitfalls. Steer clear of these common errors for flawless results:
- The #1 Sin: Overbaking! This is the most devastating mistake, resulting in a fully cooked, dense chocolate cake instead of a molten center. The “lava” will be gone! Solution: Be vigilant with timing. Start checking a minute or two before the minimum recommended time. Edges should be set, but the center must still look soft and slightly jiggly. Err on the side of underbaking.
- Improper Ramekin Preparation: Cakes sticking to the ramekins and breaking upon inversion is heartbreaking. Solution: Be meticulous with greasing (butter every Crevice) AND dusting (cocoa powder or flour for a complete coating).
- Overheating or Scorching the Chocolate: Burnt chocolate is bitter and unusable. Solution: Melt chocolate and butter gently over a double boiler or in short microwave intervals, stirring frequently.
- Overmixing the Batter (Especially After Adding Flour): Leads to a tougher cake texture instead of tender. Solution: Fold in flour and salt just until combined. Stop as soon as streaks disappear.
- Not Resting Cakes Briefly Before Inverting: Attempting to invert immediately can lead to collapse. Resting too long solidifies the center. Solution: Adhere to the 1-2 minute resting window.
- Using Low-Quality Chocolate: The flavour of the chocolate is paramount in these intensely chocolatey baked desserts. Solution: Invest in good quality chocolate with at least 60% cacao content. It makes a world of difference.
- Not Preheating Oven Sufficiently: The high heat is essential for a quick set of the exterior. Solution: Ensure your oven is fully preheated to 425°F (220°C) before the cakes go in. Baking experts consistently cite proper oven temperature as critical for success in temperature-sensitive baked desserts.
Storing Tips for the Recipe: Handling Leftovers (If Any!)
Molten chocolate lava cakes are undeniably best enjoyed fresh and warm, right out of the oven. However, if you do have leftovers or want to prep ahead:
- Baked Lava Cakes (Refrigerating): Once completely cooled, leftover baked cakes can be stored in their ramekins (covered with plastic wrap) or carefully transferred to an airtight container in the refrigerator for up to 2 days. The molten center will solidify.
- Reheating: To attempt to regain some moltenness, reheat gently in a microwave for 20-30 seconds or in a preheated 350°F (175°C) oven for 5-8 minutes until warmed through. The center may not be as liquid as when freshly baked but will still be soft and delicious.
- Unbaked Batter (Making Ahead): You can prepare the batter, divide it among the prepared ramekins, cover them tightly with plastic wrap, and refrigerate for up to 24 hours.
- Baking from Chilled: When ready to bake, remove from the refrigerator and let them sit at room temperature for about 20-30 minutes while the oven preheats. You may need to add 1-3 minutes to the baking time. This make-ahead option is fantastic for entertaining, turning these into very convenient baked desserts.
- Freezing (Not Generally Recommended for Best Molten Effect): Freezing baked lava cakes can significantly alter the texture, and achieving that perfect molten center upon reheating is challenging. Freezing unbaked batter is a better option if long-term storage is needed, though freshness is always paramount for these delicate baked desserts. If freezing unbaked batter in ramekins, thaw in the refrigerator overnight before baking as directed (allowing to come to room temp before oven).
Conclusion: You’ve Unlocked the Secret to Irresistible Molten Chocolate Lava Cakes!
There you have it – your comprehensive, foolproof guide to creating one of the most adored and impressive baked desserts on the planet: the Molten Chocolate Lava Cake. We’ve journeyed from selecting premium ingredients and mastering critical techniques like gentle folding and precise baking, to understanding how to serve and store these decadent individual treats. You’ve learned that this restaurant-quality dessert is surprisingly achievable at home, transforming simple components into an explosion of rich chocolate flavour and delightful texture. This recipe is more than just steps; it’s your passport to becoming a dessert hero.
This deep dive into molten chocolate lava cakes showcases just one example of the “10 Irresistible Baked Desserts” that can elevate any occasion. The principles of quality ingredients, careful technique, and understanding baking science apply across the board, whether you’re tackling fudgy brownies, a classic cheesecake, or a warm fruit crumble.
Ready to unleash an eruption of pure chocolate joy and impress everyone with your baking prowess? We wholeheartedly encourage you to try this Molten Chocolate Lava Cake recipe! Let us know how your baking adventure turns out in the comments below. Share your photos, your successes, and any delightful variations you discover. We love seeing your culinary masterpieces! Eager to explore other baked desserts? Check out our decadent [Link to Fudgy Brownie Recipe] or our guide to the perfect [Link to Classic Apple Pie]. Happy Baking!
FAQs: Your Molten Chocolate Lava Cake Queries Answered
- Q1: What is the absolute best type of chocolate to use for Molten Chocolate Lava Cakes? A1: For the ultimate flavour and molten texture in these baked desserts, use high-quality bittersweet or semi-sweet chocolate with a cacao percentage between 60-70%. Chopped bar chocolate melts more smoothly and consistently than chocolate chips (which often contain stabilizers to hold their shape). Brands like Valrhona, Callebaut, Ghirardelli, or a good quality baking chocolate bar are excellent choices.
- Q2: My lava cakes didn’t have a molten center; they were fully cooked through. What did I do wrong? A2: This is almost always due to overbaking. Oven temperatures can vary, and the line between perfectly molten and fully cooked is very fine (often just a minute or two). Next time, try reducing the baking time by 1-2 minutes. Ensure your oven is not running hotter than indicated. The center should still look soft and slightly jiggly when you remove them.
- Q3: Can I make these lava cakes without individual ramekins? A3: While ramekins are ideal for the classic individual presentation and even baking of these delicate baked desserts, you could potentially bake the batter in a standard muffin tin (well-greased and cocoa-dusted). However, baking time would need to be significantly reduced (likely 8-10 minutes), and unmolding them cleanly would be more challenging. The iconic “lava flow” is best achieved with ramekins.
- Q4: How do I know exactly when to take the lava cakes out of the oven for the perfect molten center? A4: This requires a bit of practice and knowing your oven. The visual cues are key: the edges of the cake should be set and slightly puffed, pulling away from the sides of the ramekin just a little. The very center (about the size of a quarter or half-dollar) should still look soft, slightly wet, and will jiggle when you gently nudge the pan. It’s better to err on the side of slightly underbaking if you prioritize a very liquid center.
- Q5: Can I prepare the lava cake batter ahead of time? A5: Yes! This is a great make-ahead dessert. Prepare the batter as directed, divide it among your prepared ramekins, cover them tightly with plastic wrap, and refrigerate for up to 24 hours. When ready to bake, let them sit at room temperature for about 20-30 minutes while your oven preheats, then bake as directed, possibly adding an extra 1-3 minutes to the baking time. This makes them one of the most convenient yet impressive baked desserts for entertaining.
- Q6: Why are egg yolks an important ingredient in this specific lava cake recipe? A6: The additional egg yolks contribute significant richness and a slightly custardy texture to the cake portion, while also helping create a more stable emulsion for the molten center. They elevate the overall mouthfeel and luxuriousness of these baked desserts, making them stand out from recipes that only use whole eggs.